 Customer Support
  Subscribe


 Account
  Wishlist
3 Beginner Painting Techniques to Always Practice

on Jul 31, 2018

Every painter starts with certain techniques. Take a look at these basic techniques that every beginner should master to make their models awesome.
Base coats, washing, and drybrushing are three incredibly important techniques to have in your repertoire of painting skills. Getting those beginner techniques down is very important to build up confidence in your painting.
Take a look at three important techniques to always practice while painting your models. This tutorial utilizes airbrushing, but you can do similar techniques using solely a paintbrush as well. Watch the entire tutorial video below after reading this overview!
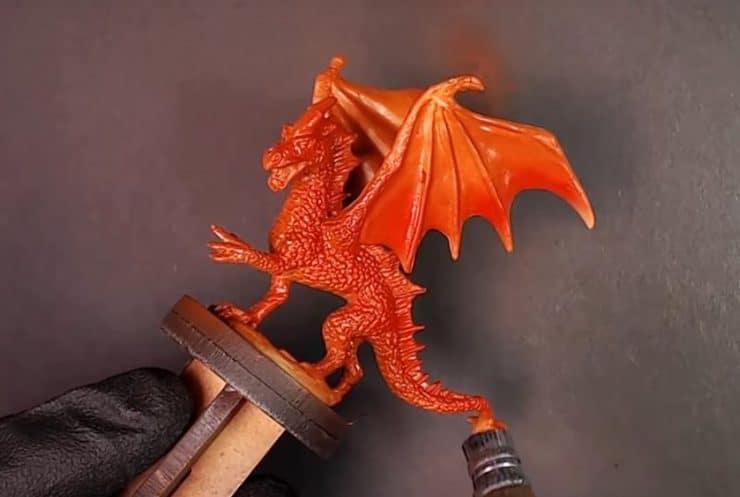
To start off, mix Bloodstone by P3 into the airbrush, along with some Flow Improver. Browns, such as Bloodstone, are a great way to build up reds to make them more vibrant. After two or three thin coats, cover the model in a rich brown with an even spray. Always work in thin layers with the airbrush so you get nice, even coats!
After this layer is dry, mix some Mephiston Red by Games Workshop into the Bloodstone and spray the model from the top down. Add in some Evil Sunz Scarlet into the pot to brighten up the reds and continue to spray using that top-down technique. Finally, use Wild Rider Red by Games Workshop as a final highlight towards the top, making all the reds pop.
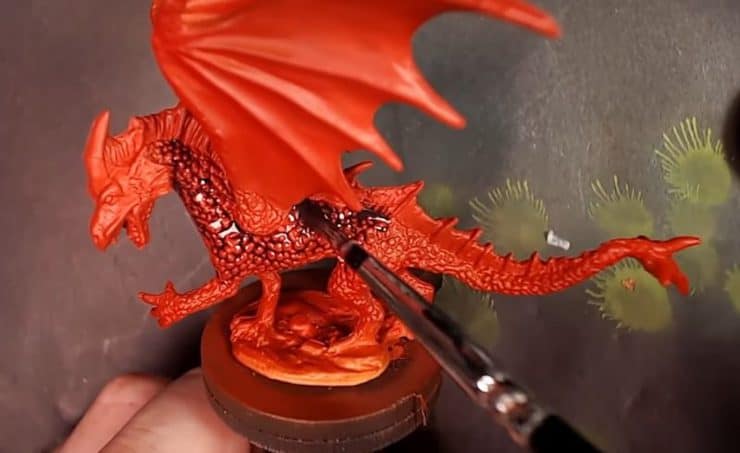
To create contrast with that bright red and bring out the details, a wash is a great tool to use. Mix Army Painter’s Red Tone, Dark Tone, and Purple Tone with Quickshade Mixing Medium to create a great wash that enhances the reds and adds a bit of purple. Dab the wash into crevices to prevent pooling in one spot and help prevent staining.

Once the wash is dry, mix Evil Sunz Scarlet and Wild Rider Red together and apply to a drybrush. Use a top-down motion to lightly apply the paint over the edges of the scales. Then, add some Troll Slayer Orange to the mix and do the same thing. This will help apply a subtle color transition. Finally, add a little yellow to give a sharp contrast in spots that should have bright highlights. Use the same mix to apply highlights to the wing ridges.
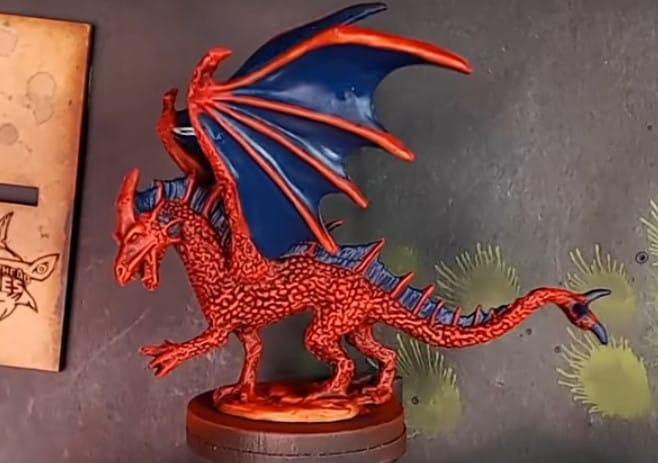
To add more contrast, use blue on the webbing down the dragon’s black and on the wings. Apply in thin coats to help maintain detail.
There it is, three easy techniques to use as a foundation for more advanced techniques later. With basing, you are applying colors for the overall scheme. Using an airbrush, you have the option of basing and building different transitions.
Second, wash to bring out the contrast in the shadowy recesses of the model. Finally, drybrush and layer to highlight and bring the edges out to also apply contrast. Once you have these techniques down, more advanced techniques are easy to add in. Be sure to watch the entire process in the video below!